GTM Container Template
The GTM Container Template is a pre-configured GTM container export that contains all the necessary tags, triggers, and variables to integrate your WHMCS with Google Tag Manager. Importing it lets you skip manual configuration and get tracking running in minutes.
Prerequisites
Before importing the template, make sure you have:
- The WHMCS GTM module installed and activated with your GTM Container ID configured. See Module Configuration.
- A Google Tag Manager account with a container already created for your WHMCS store.
- A Google Analytics 4 property with a Measurement ID and, optionally, a Measurement Protocol API Secret.
What's Included
The template ships with everything pre-configured and organized into folders for easy management:
- Tags — Ready-to-use tags for Google Analytics 4 (ecommerce and general events), Google Tag, Conversion Linker, and starter templates for Google Ads conversion tracking and remarketing.
- Triggers — Custom event triggers mapped to every WHMCS GTM data layer event, covering the full ecommerce funnel (view item, add to cart, begin checkout, purchase, and more) as well as general engagement events (sign up, login, support tickets).
- Variables — A complete set of pre-built data layer variables organized by category: customer data, user session data, ecommerce payload, WHMCS page context, and Google configuration constants. Includes both plain and SHA-256 hashed variants of customer PII fields for use with Enhanced Conversions and CAPI integrations.
The Google Ads Conversion Tracking and Remarketing tags are included as ready-to-use templates but are paused by default. They will not fire until you enter your Google Ads Conversion ID / label and manually unpause them.
How to Import the GTM Container Template
Firstly, download the GTM Container Template from your product download area and extract the file to your local machine.
Importing the Container
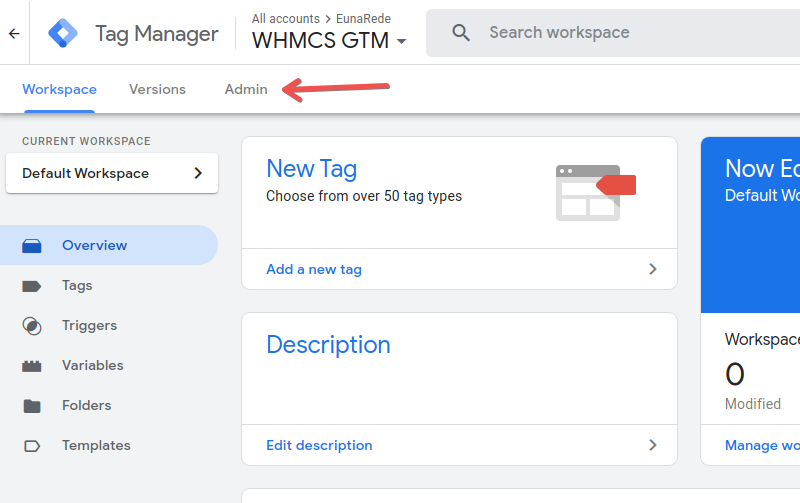
Log in to your Google Tag Manager account, select your container, and click on the Admin tab.
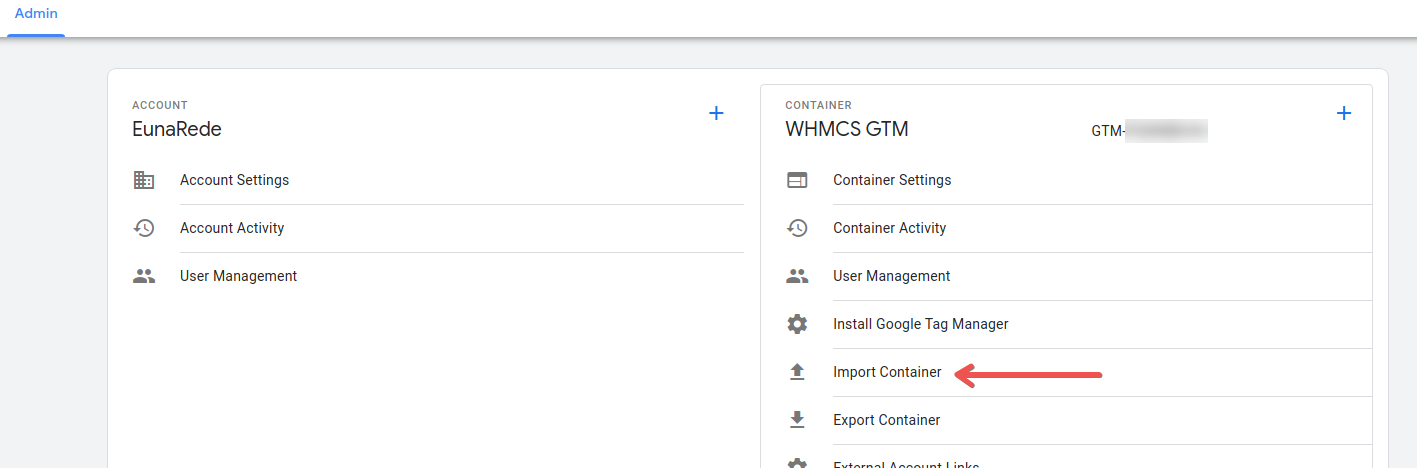
In the Container section, click on Import Container.
Click on Choose Container File and select the GTM Container Template file.
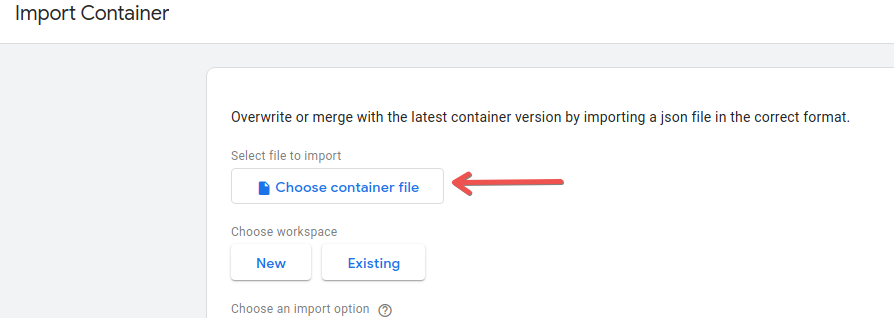
Now, choose which workspace you want to import the container into.
- New: all imported tags, triggers, and variables will be added to a new workspace that will be created.
- Existing: imported data will be added to the selected workspace.

If you need to keep your workspace intact but want to test the GTM Container Template, select the New option. This will allow you to deploy the new workspace without impacting any tags you may already have in an existing workspace.
When importing your container, you will have the option to merge the imported content with the selected workspace, or overwrite the workspace entirely. Overwriting will remove all your existing tags, triggers, and variables in that workspace and replace them with the imported container.
If you import into an existing workspace, select the Merge option.
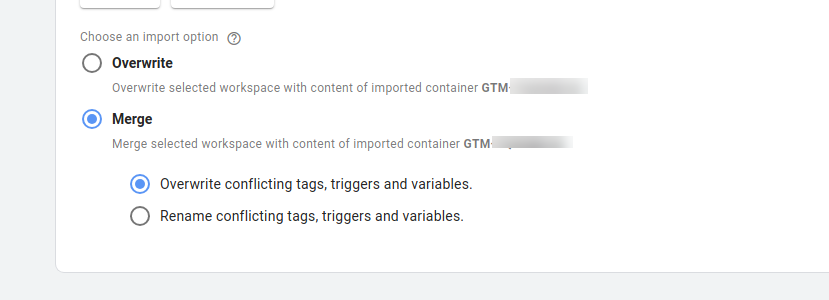
After checking the Merge option, you can set whether any conflicting tags, triggers, or variables should be overwritten. We recommend choosing the Overwrite option.
Now, review the imported container to ensure that all tags, triggers, and variables are correctly configured.
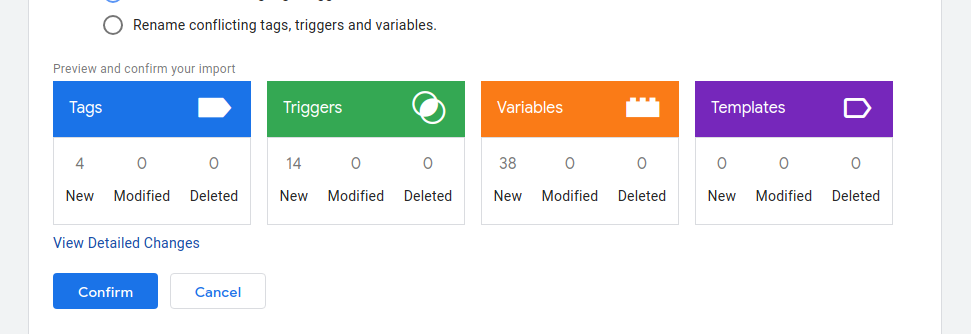
Finally, click on Confirm to import the GTM Container Template.
This template is built to minimize conflicts with your existing tags, triggers, and variables. However, we recommend that you review the imported container to ensure all configurations are correct before publishing.
After Importing — Required Configuration
After importing, there are two variables you must update before publishing:
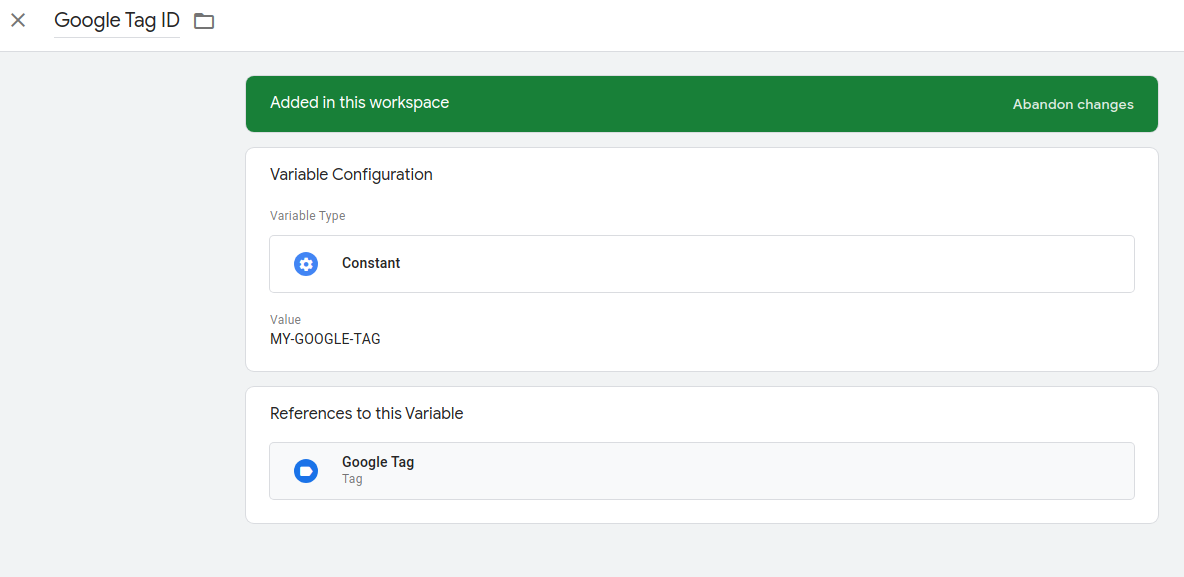
Google Tag ID
This variable holds the Google Tag ID used by the Google Tag, Google Ads, and Conversion Linker tags. In the Variables section, search for Google Tag ID and update the value with your Google Tag ID.
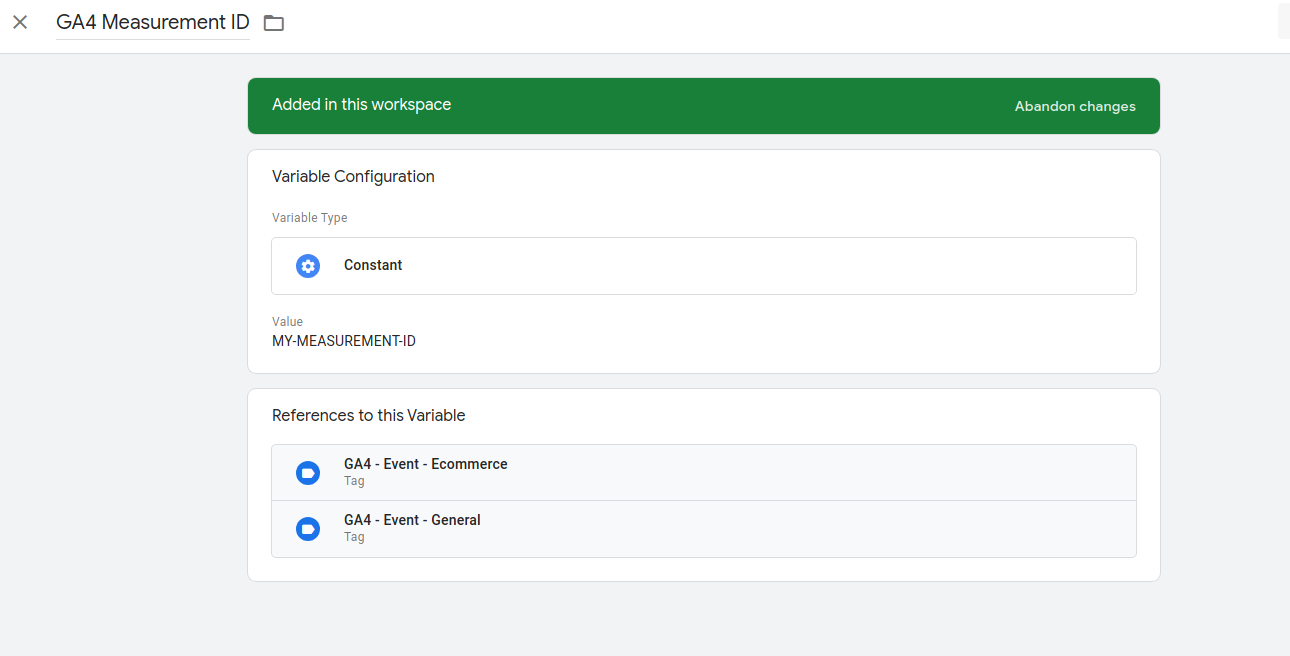
GA4 Measurement ID
This variable holds the Measurement ID used by the GA4 event tags. In the Variables section, search for GA4 Measurement ID and update the value with your Measurement ID.
Use the same Measurement ID here as the one you configured in the module settings. Consistent IDs ensure that both client-side and server-side (Measurement Protocol) events are attributed to the same GA4 property.
After updating these variables, publish the workspace to activate tracking on your WHMCS store.
What's Next
- Tags — Learn how each tag is configured and how to customize them.
- Variables — Full reference of all data layer variables available.
- Facebook CAPI — Use the pre-built Customer Data variables to improve Facebook Event Match Quality.